Windows Longhorn/6.0.4051.idx02.031001-1340: Difference between revisions
(fixing) |
(tour) |
||
| Line 17: | Line 17: | ||
* Only the basic sidebar tiles are included: ''Classic Tray'', ''Clock'', ''Quick Launch'', ''Slide Show'' and ''Sync''. | * Only the basic sidebar tiles are included: ''Classic Tray'', ''Clock'', ''Quick Launch'', ''Slide Show'' and ''Sync''. | ||
* Self-Healing NTFS. | * Self-Healing NTFS. | ||
==Self-Guided Longhorn Tour== | |||
Microsoft provided a high-level introduction to some of the new features and capabilities of build 4051:<ref>{{cite web | url = http://msdn.microsoft.com:80/longhorn/productinfo/tour/ | title = Take a Self-Guided Longhorn Tour | author = The Windows Team | publisher = MSDN | archiveurl = https://web.archive.org/web/20031030203436/http://msdn.microsoft.com:80/longhorn/productinfo/tour/ | archivedate = 30 October 2003 | accessdate = 29 March 2021}}</ref> | |||
<blockquote> | |||
===Get started=== | |||
# Log in to Longhorn. | |||
# Notice that the visual theme is different than the one shown in the PDC demo. This temporary theme is called "Slate," and it will later be replaced by the final Windows "Longhorn" visual theme. | |||
===Explore the new functionality=== | |||
# From the Start menu, click Computer. This is a place from which you can get to all of your storage locations, such as the WinFXTM default store. | |||
# Open the "DefaultStore," which is a view of WinFX through the Win32® APIs. Drag in copies of a variety of photos, music, and documents. (Use only copies of your data to prevent data loss.) | |||
* Because WinFX is still in development: | |||
** It might take several minutes to copy the files and promote the metadata. | |||
** You cannot rename items that you've added to WinFX. | |||
** Saving files might be an issue because of application compatibility. | |||
# Open the Start menu and click Music. The music you added to the WinFX default store appears in the music collection. | |||
# Click the column heading Artist and select Stack by artist. The items appear in stacks according to their artist metadata. Double-click a stack to see music by a specific artist. | |||
# Click the column heading Track Number. Pick one, and the list narrows to only items with that track number. | |||
# Notice how your navigations are tracked in the Address bar. You can click on any item in the address bar to navigate, or click the drop-down control to the right of each item to navigate to one of the item's peers. | |||
# Find the text box labeled Filter by on the left. This is called the wordwheel, and it allows you to quickly filter the items you see based on what you type. Type an artist's name and notice that, as you type, the items are filtered and only items related to what you typed remain. | |||
# In the Address bar, click the drop-down control next to Music and select Photos and Videos to navigate to the photos and videos collection. The photos you previously added to WinFX appear. | |||
# Use the Address bar to navigate to "Documents". Select a document, and a thumbnail of the document appears in the preview pane, along with relevant tasks and metadata for the item. | |||
# From the preview pane, click Add a category. Type categories related to the document (separated by semicolons) and press Enter. Because it's in development, this might take a few minutes. | |||
# Click the column heading Category and then select one of the categories that you added. The items will filter to only the item for which you attached this category. | |||
# Sign on to Windows Messenger. After a few minutes, your buddies will be added to WinFX so that they will appear in your collection of contacts, and in the Contact Picker. | |||
# Use the Address bar to navigate to Contacts. All your WinFX contacts, including your Messenger buddies, appear. Double-click a contact to view and edit details for the contact. | |||
# To add contacts from Active Directory to your contact collection, open the File menu and click Add contacts. This launches the Contact Picker. To find the contact you want to add, type a name in the Search For text box, and then click Search. Select the contact and click Add. | |||
===Other things to try=== | |||
# The clock on the right side of the desktop is part of a new feature called the sidebar. Right-click the sidebar to select more tiles like this one. | |||
# Right-click the desktop and select New and then Slideshow. This wizard includes a new control called Listmaker, which applications can use to create a list of items from a variety of locations. Use the Address bar in the wizard to navigate to Photos and Videos, drag some photos into the basket, select Next, and add some music. | |||
# Open a photo with red-eye. You can use the Windows Picture Viewer to easily adjust red-eye or crop a photo. | |||
# Click the View control button in the toolbar and a slider control appears. Slide it up or down to resize your photos in real time. | |||
From the photos and videos collection, select some photos and click the Burn to disc task in the preview pane (this task only appears if a disc burner is installed). Data burning is enabled, but DVD, audio, and video are not yet supported. Choose Make a data disc, drag files into the basket, arrange the files, and click Burn. | |||
# Open Internet Explorer and navigate to a Web site that frequently has unwanted pop-ups. After closing the pop-ups, go to the Tools menu, click Block Pop-up windows, and then click OK. Reload the page, and it is pop-up free. | |||
# Click the Internet Explorer Address Bar drop-down menu, and see all the sites you've been to. To clean this browsing history, go to the Tools menu and click Clear Browsing Records. | |||
</blockquote> | |||
==Screenshots== | ==Screenshots== | ||
<gallery> | <gallery> | ||
| Line 29: | Line 66: | ||
image:4051SelfHealing.png|Self-Healing NTFS in 4051. | image:4051SelfHealing.png|Self-Healing NTFS in 4051. | ||
</gallery> | </gallery> | ||
==References== | |||
<references /> | |||
==External links== | ==External links== | ||
| Line 39: | Line 79: | ||
{{stub}} | {{stub}} | ||
Revision as of 11:22, 29 March 2021
 |
|
| Kernel version | NT 6.0 |
|---|---|
| CPU architecture | x86, AMD64 |
| Edition | Professional |
| BIOS date | October 2, 2003 |
Windows "Longhorn" build 4051 (with a build tag of 4051.idx02.031001-1340) is a Milestone 7 build of Windows "Longhorn" and is also the build given to attendees of Microsoft's Professional Developers Conference of 2003. It leaked on October 20, 2003.
Features
- Documents and Photos and Videos libraries.
- The prefix "My" was dropped, resulting in new names for locations Computer, Network Places and Contacts.
- If the Windows Sidebar is enabled in the 32-bit version, the word "Start" is removed from the Start button (similar to later builds of Windows Vista). The x64 version lacks the sidebar completely.
- Internet Explorer 6.05 included an add-on manager, a download manager, pop-up blocker, and a tool to quickly delete browsing history.
- Only the basic sidebar tiles are included: Classic Tray, Clock, Quick Launch, Slide Show and Sync.
- Self-Healing NTFS.
Self-Guided Longhorn Tour
Microsoft provided a high-level introduction to some of the new features and capabilities of build 4051:[1]
Get started
- Log in to Longhorn.
- Notice that the visual theme is different than the one shown in the PDC demo. This temporary theme is called "Slate," and it will later be replaced by the final Windows "Longhorn" visual theme.
Explore the new functionality
- From the Start menu, click Computer. This is a place from which you can get to all of your storage locations, such as the WinFXTM default store.
- Open the "DefaultStore," which is a view of WinFX through the Win32® APIs. Drag in copies of a variety of photos, music, and documents. (Use only copies of your data to prevent data loss.)
- Because WinFX is still in development:
- It might take several minutes to copy the files and promote the metadata.
- You cannot rename items that you've added to WinFX.
- Saving files might be an issue because of application compatibility.
- Open the Start menu and click Music. The music you added to the WinFX default store appears in the music collection.
- Click the column heading Artist and select Stack by artist. The items appear in stacks according to their artist metadata. Double-click a stack to see music by a specific artist.
- Click the column heading Track Number. Pick one, and the list narrows to only items with that track number.
- Notice how your navigations are tracked in the Address bar. You can click on any item in the address bar to navigate, or click the drop-down control to the right of each item to navigate to one of the item's peers.
- Find the text box labeled Filter by on the left. This is called the wordwheel, and it allows you to quickly filter the items you see based on what you type. Type an artist's name and notice that, as you type, the items are filtered and only items related to what you typed remain.
- In the Address bar, click the drop-down control next to Music and select Photos and Videos to navigate to the photos and videos collection. The photos you previously added to WinFX appear.
- Use the Address bar to navigate to "Documents". Select a document, and a thumbnail of the document appears in the preview pane, along with relevant tasks and metadata for the item.
- From the preview pane, click Add a category. Type categories related to the document (separated by semicolons) and press Enter. Because it's in development, this might take a few minutes.
- Click the column heading Category and then select one of the categories that you added. The items will filter to only the item for which you attached this category.
- Sign on to Windows Messenger. After a few minutes, your buddies will be added to WinFX so that they will appear in your collection of contacts, and in the Contact Picker.
- Use the Address bar to navigate to Contacts. All your WinFX contacts, including your Messenger buddies, appear. Double-click a contact to view and edit details for the contact.
- To add contacts from Active Directory to your contact collection, open the File menu and click Add contacts. This launches the Contact Picker. To find the contact you want to add, type a name in the Search For text box, and then click Search. Select the contact and click Add.
Other things to try
- The clock on the right side of the desktop is part of a new feature called the sidebar. Right-click the sidebar to select more tiles like this one.
- Right-click the desktop and select New and then Slideshow. This wizard includes a new control called Listmaker, which applications can use to create a list of items from a variety of locations. Use the Address bar in the wizard to navigate to Photos and Videos, drag some photos into the basket, select Next, and add some music.
- Open a photo with red-eye. You can use the Windows Picture Viewer to easily adjust red-eye or crop a photo.
- Click the View control button in the toolbar and a slider control appears. Slide it up or down to resize your photos in real time.
From the photos and videos collection, select some photos and click the Burn to disc task in the preview pane (this task only appears if a disc burner is installed). Data burning is enabled, but DVD, audio, and video are not yet supported. Choose Make a data disc, drag files into the basket, arrange the files, and click Burn.
- Open Internet Explorer and navigate to a Web site that frequently has unwanted pop-ups. After closing the pop-ups, go to the Tools menu, click Block Pop-up windows, and then click OK. Reload the page, and it is pop-up free.
- Click the Internet Explorer Address Bar drop-down menu, and see all the sites you've been to. To clean this browsing history, go to the Tools menu and click Clear Browsing Records.
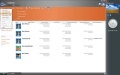
Screenshots
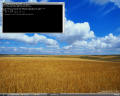
Desktop in 4051.
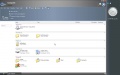
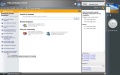
The Computer folder in 4051.
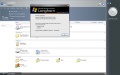
About Windows dialog box.
The new Windows Contacts folder.
The updated Help and Support Center.

Scalable icons in Windows Explorer.
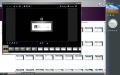
4051 Windows Picture Viewer.

Start menu.
Self-Healing NTFS in 4051.


References
- ↑ The Windows Team. Take a Self-Guided Longhorn Tour. MSDN. Archived from the original on 30 October 2003. Retrieved on 29 March 2021.
External links
- Windows Codename "Longhorn PDC" Build 4051 Tweak Guide by Chris123NT and Nighthawk
- Paul Thurrott's Windows "Longhorn" build 4051 Gallery - Part 1
- Paul Thurrott's Windows "Longhorn" build 4051 Gallery - Part 2
- Paul Thurrott's Windows "Longhorn" build 4051 Gallery - Part 3
- Paul Thurrott's review of Windows "Longhorn" build 4051
- Paul Thurrott's list of tips & tricks for Windows "Longhorn" build 4051
| The following article is a stub. You can help BetaArchive Wiki by expanding it. |