No edit summary |
No edit summary Tag: 2017 source edit |
||
| (13 intermediate revisions by 2 users not shown) | |||
| Line 1: | Line 1: | ||
{{Infobox Buildinfo | {{Infobox Buildinfo | ||
|image = Chicago Build 58s Chic58s | |image = Chicago Build 58s Chic58s 10.png | ||
|imagecaption = 4.00.58s | |imagecaption = 4.00.58s | ||
|kernel= Windows 9x (4.00) | |kernel= Windows 9x (4.00) | ||
|arch = x86 | |arch = x86 | ||
|sku = N/A | |sku = N/A | ||
|bios = | |bios = 10th August 1993 | ||
| | |tcb = [http://www.thecollectionbook.info/builds/windows/build/2 Beta ID: 990036] | ||
}} | }} | ||
'''Windows 95 | '''Windows 95 build 58s''' is the Chicago Preliminary Development Kit build and part of the Milestone 4 stage. It is currently the earliest leaked build of [[Windows 95|Chicago]]. It is most known for its early shell, which had 3 start buttons and menus instead of one. There was believed to be a build 56 of Chicago for many years. It was later found to be a modification of 58s and removed from the FTP. | ||
== Additions == | == Additions == | ||
* | * You can store any folder on the taskbar. | ||
* There are three buttons available on the taskbar. The first is used for the main process. The second is used for finding. The third is used for help. | * There are three buttons available on the taskbar. The first is used for the main process. The second is used for finding. The third is used for help. | ||
* This build includes a new boot screen that available inside <code>C:\LOGO.SYS</code>. | * This build includes a new boot screen that is available inside <code>C:\LOGO.SYS</code>. | ||
* | * Dr. Watson and Tracker now starts by default. | ||
* <code>CAB32.EXE</code> added for exploring files and folders easier without File Manager. | * <code>CAB32.EXE</code> was added for exploring files and folders easier without File Manager. It is available on the desktop as <code>File cabinet>></code>. | ||
* Recycle Bin added | * Recycle Bin was added, called <code>Recycle.bin</code>. | ||
* | * Windows 3.1 programs are stored inside the <code>Programs</code> folder. | ||
* Network folder added | * Network folder was added, called <code>Network>></code>. | ||
* Clock added | * Clock was added to the taskbar. | ||
== Changes == | == Changes == | ||
* | * The user interface now has a rectangle instead of a radius rectangle. | ||
* Desktop color changed | * Desktop color changed to turquoise. Desktop wallpaper changed to <code>WARNING.BMP</code>, saying "Under Construction". | ||
== Installation | == Installation == | ||
''Installing from Windows 95 | ''Installing from Windows 95 boot floppy:'' | ||
# Prepare disk with <code>fdisk</code>, reboot, then format (<code>format C:</code>). | |||
# Change path to the CD-ROM and go to the <code>RETAIL</code> directory. | |||
# Run <code>dossetup</code>. | |||
# Accept the default settings and then continue to the file copying process. | |||
# When complete, reboot with the floppy still connected. | |||
# Run <code>edit</code> and press <code>ALT+F+O</code>. Browse to <code>C:\config.sys</code>. | |||
# Change <code>Files=30</code> and <code>Buffers=30</code> to <code>Files=90</code> and <code>Buffers=90</code>. | |||
# Save changes (<code>ALT+F+S</code>) then exit (<code>ALT+F+X</code>). | |||
# Remove floppy and then boot to Windows. | |||
== Gallery == | == Gallery == | ||
<gallery> | <gallery> | ||
Chicago Build 58s Chic58s 1.png|Installing Plus Pack components | |||
Chicago Build 58s Chic58s 2.png|Welcome to setup | |||
Chicago Build 58s Chic58s 3.png|Install directory | |||
Chicago Build 58s Chic58s 4.png|Hardware settings | |||
Chicago Build 58s Chic58s 5.png|Copying files | |||
Chicago Build 58s Chic58s 6.png|End setup | |||
Chicago Build 58s Chic58s 7.png|Boot screen | |||
Chicago Build 58s Chic58s 8.png|Warning | |||
Chicago Build 58s Chic58s 10.png|Desktop | |||
Chicago Build 58s Chic58s 11.png | |||
Chicago Build 58s Chic58s 12.png | |||
Chicago Build 58s Chic58s 13.png | |||
Chicago Build 58s Chic58s 14.png|Programs | |||
Chicago Build 58s Chic58s 15.png|File Cabinet | |||
Chicago Build 58s Chic58s 17.png|WinBug | |||
Chicago Build 58s Chic58s 9.png|Printer setup | |||
Chicago Build 58s Chic58s 18.png|Control Panel | |||
Chicago Build 58s Chic58s 19.png|Advanced system features | |||
Chicago Build 58s Chic58s 20.png|Metrics | |||
Chicago Build 58s Chic58s 21.png|System properties | |||
Chicago Build 58s Chic58s 22.png|About dialog | |||
Chicago Build 58s Chic58s 23.png|Help | |||
Chicago Build 58s Chic58s 27.png|Shutdown Windows | |||
Chicago Build 58s Chic58s 28.png|Safe to shutdown screen | |||
Old Wiki Images Chicagoinfocenter1.gif|Info Center, image from [http://oyvind.servehttp.com/windows_chicago_build_58.htm] | |||
</gallery> | </gallery> | ||
Latest revision as of 14:36, 7 November 2023
 |
|
| 4.00.58s | |
| Kernel version | Windows 9x (4.00) |
|---|---|
| CPU architecture | x86 |
| Edition | N/A |
| BIOS date | 10th August 1993 |
| TCB | Beta ID: 990036 |
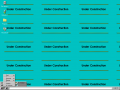
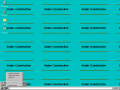
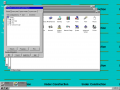
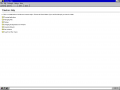
Windows 95 build 58s is the Chicago Preliminary Development Kit build and part of the Milestone 4 stage. It is currently the earliest leaked build of Chicago. It is most known for its early shell, which had 3 start buttons and menus instead of one. There was believed to be a build 56 of Chicago for many years. It was later found to be a modification of 58s and removed from the FTP.
Additions
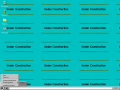
- You can store any folder on the taskbar.
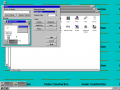
- There are three buttons available on the taskbar. The first is used for the main process. The second is used for finding. The third is used for help.
- This build includes a new boot screen that is available inside
C:\LOGO.SYS. - Dr. Watson and Tracker now starts by default.
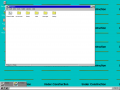
CAB32.EXEwas added for exploring files and folders easier without File Manager. It is available on the desktop asFile cabinet>>.- Recycle Bin was added, called
Recycle.bin. - Windows 3.1 programs are stored inside the
Programsfolder. - Network folder was added, called
Network>>. - Clock was added to the taskbar.
Changes
- The user interface now has a rectangle instead of a radius rectangle.
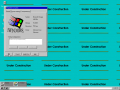
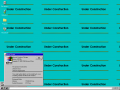
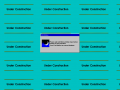
- Desktop color changed to turquoise. Desktop wallpaper changed to
WARNING.BMP, saying "Under Construction".
Installation
Installing from Windows 95 boot floppy:
- Prepare disk with
fdisk, reboot, then format (format C:). - Change path to the CD-ROM and go to the
RETAILdirectory. - Run
dossetup. - Accept the default settings and then continue to the file copying process.
- When complete, reboot with the floppy still connected.
- Run
editand pressALT+F+O. Browse toC:\config.sys. - Change
Files=30andBuffers=30toFiles=90andBuffers=90. - Save changes (
ALT+F+S) then exit (ALT+F+X). - Remove floppy and then boot to Windows.
Gallery
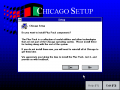
Installing Plus Pack components
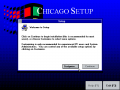
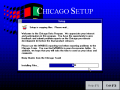
Welcome to setup
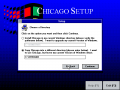
Install directory
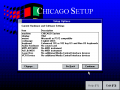
Hardware settings
Copying files

End setup

Boot screen
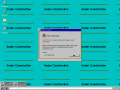
Warning
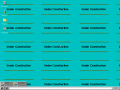
Desktop
Programs

File Cabinet

WinBug
Printer setup

Control Panel
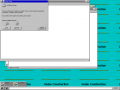
Advanced system features
Metrics
System properties
About dialog
Help
Shutdown Windows
Safe to shutdown screen
![Info Center, image from [1]](/wiki/images/thumb/b/b8/Old_Wiki_Images_Chicagoinfocenter1.gif/120px-Old_Wiki_Images_Chicagoinfocenter1.gif)
Info Center, image from [1]


![Info Center, image from [1]](/wiki/index.php?title=File:Old_Wiki_Images_Chicagoinfocenter1.gif)