 |
|
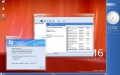
| Aero in Windows 7 | |
| Caption buttons | |
| Taskbar | |
| Notification area | |
| First seen | "Longhorn" build 4015.main |
|---|---|
| Last seen | |
Aero is the translucent, glass-like visual style present in Windows Vista and Windows 7.
History
Aero originated in Windows "Longhorn", first seen in "Longhorn" build 4015.main.[1]
In Windows Vista and Windows 7, minimum hardware requirements for Windows Aero are a DirectX 9 GPU with the following features: support for the Windows Display Driver Model, Pixel Shader 2.0, 32 bits per pixel, and a minimum 128 MB of video memory.[2][3][4] If capable hardware is not present, the operating system will fall back to the Windows Basic theme.
A variation of the original theme, called Aero Lite was first seen in Windows 8 build 7955. The original theme was changed in Windows 8 build 8102, and was later flattened in the Release Preview, becoming visually similar to the Watercolor theme used in earlier versions of Windows XP.
In Windows 8, starting with Milestone 2, the theme is capable of being rendered by the software, allowing one to use the visual style without capable hardware, though this may result in degradation of system performance.
The RTM version of Windows 8 introduced a new theme designed to match Microsoft's Metro design language and aesthetic. The new theme removed the translucent window effects and flattened gradients.[5]
Guides
BetaArchive user Courage wrote a guide to enable Aero Glass in post-reset Vista builds, installed in a virtual machine running on VMware Workstation 10 or 11. The guide contains links to ISOs containing WDDM Display Drivers from Workstation 11 and AMD64 (x64) drivers.[6]
Vista build 5381 and later
1. First, start creating your VM, but make sure to select Custom in the first screen.
2. Set the HW compatibility to Workstation 10.0 (for 11 users). You do not need to change the compatibility in earlier versions.
3. Set the Guest OS option to 'Windows Vista'.
4. Install the build as normal, including setting the BIOS Date.
5. After installing, open regedit and browse to Computer\HKEY_CURRENT_USER\Software\Microsoft\Windows\DWM.
6. Over there, create a DWORD key named CompositionPolicy and set its value to 2.
7. Open Device Manager, browse to the 'Display Adapters' section, and right-click on the name of your display adapter. Select 'Update Driver Software' on the menu that comes up.
8. Select 'Browse my computer for driver software' and mount the ISO containing the display drivers from the 'Items you need' section.
9. Point the installer to the 'video_wddm' folder of the root of the ISO and click 'Next'. After the display driver installs, reboot the VM.
10. Aero Glass should be automatically enabled. It will be a bit slow, but it works.
Here's the ones for 5536 and 5754 as well:
— Courage, Enabling Aero in Windows Vista 50xx+ x86 (VMware), [6]


Vista builds 5048, 5219-5270
1. Follow Steps 1-4 of the previous guide. NOTE: For 5231.X, use 'Workstation 6.0' as the compatibility mode!
2. After installing, open regedit. From here, it branches off into two different paths, depending on which build you want to use:
Builds 5048, 5219 & 5231.X:
(i) Browse to HKEY_LOCAL_MACHINE\Software\Microsoft\DWM. (if the key does not exist, create it.)
(i) Over there, create a DWORD key named EnableMachineCheck and set its value to 0.
Builds 5259.X & 5270:
(i) Browse to HKEY_CURRENT_USER\Software\Microsoft\DWM. (if the key does not exist, create it.)
(i) Over there, create a DWORD key named UseMachineCheck and set its value to 0.
3. After this, open Device Manager, browse to the 'Display Adapters' section, and right-click on the name of your display adapter. Select 'Update Driver Software' on the menu that comes up.
4. Select the options required to choose your driver manually. (Sorry, but there is no screenshot for this one as these builds use different interfaces. 5048 & 5219 use the XP-style interface while the later builds use the Vista-style.)
5. When you have to install the driver, mount the ISO you downloaded way back in the beginning and point it to the 'video_xpdm' in the root directory of the ISO.
6. You will receive an error about the drivers not being signed. Ignore it.
7. After the driver installs, reboot the computer. You should have Aero Glass enabled unless if you use 5048.
8. (Thanks to ovctvct!) If you use 5048, open services.msc and enable the 'User Experience Session Management' service by setting it to automatically start on start up.
9. After you reboot, you must log off and log on again on every startup to enable Aero.
— Courage, Enabling Aero in Windows Vista 50xx+ x86 (VMware), [6]


Gallery
Aero borders on Plex in "Longhorn" 4039

Aero in Windows Vista

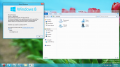
Aero in Windows 7
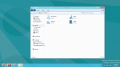
Aero in Windows 8 Consumer Preview
Aero in Windows 8 Release Preview


References
- ↑ Albacore (@thebookisclosed) (11 December 2021). Longhorn Build 4015 also includes the earliest ever implementation of the Carousel view! Here's all the cool stuff in one place:- Earliest glass frames- Desktop aurora- Earliest carouselI wish I could show this to someone back in 2003 who wasn't particularly wowed by 4015 😁. Twitter. Retrieved on 16 April 2022.
- ↑ Microsoft. "System requirements for Windows Vista"
- ↑ Microsoft. "What is Windows Aero?"
- ↑ Microsoft. "What is the Aero desktop experience?
- ↑ Harris, Jensen. (May 17, 2012). "Creating the Windows 8 user experience"
- ↑ 6.0 6.1 6.2 Courage (26 April 2015). Enabling Aero in Windows Vista 50xx+ x86 (VMware). BetaArchive. Retrieved on 5 May 2022.
| The following article is a stub. You can help BetaArchive Wiki by expanding it. |